> ## Documentation Index
> Fetch the complete documentation index at: https://docs.qonto.com/llms.txt
> Use this file to discover all available pages before exploring further.
# The OAuth flow
> OAuth 2.0 is a protocol that lets your app request access to a Qonto user account without getting their password. Your app can ask for [specific permissions](/get-started/business-api/authentication/oauth/available-scopes) that the user will be able to review and validate.
Once the user has granted you access to his account you will be able to get a token that can be use to access Qonto API on his behalf.
**New to OAuth 2.0?** Check out these generic guides before diving in:
* [OAuth 2 Explained In Simple Terms](https://www.youtube.com/watch?v=ZV5yTm4pT8g) — ByteByteGo video (4:30)
* [What is OAuth 2.0?](https://auth0.com/intro-to-iam/what-is-oauth-2) — Auth0 written guide
**Already have an API key?** If you only need to automate your own Qonto account, you may not need OAuth at all. Check the [authentication introduction](/get-started/business-api/authentication/introduction) to pick the right method for your use case.
## Step by step
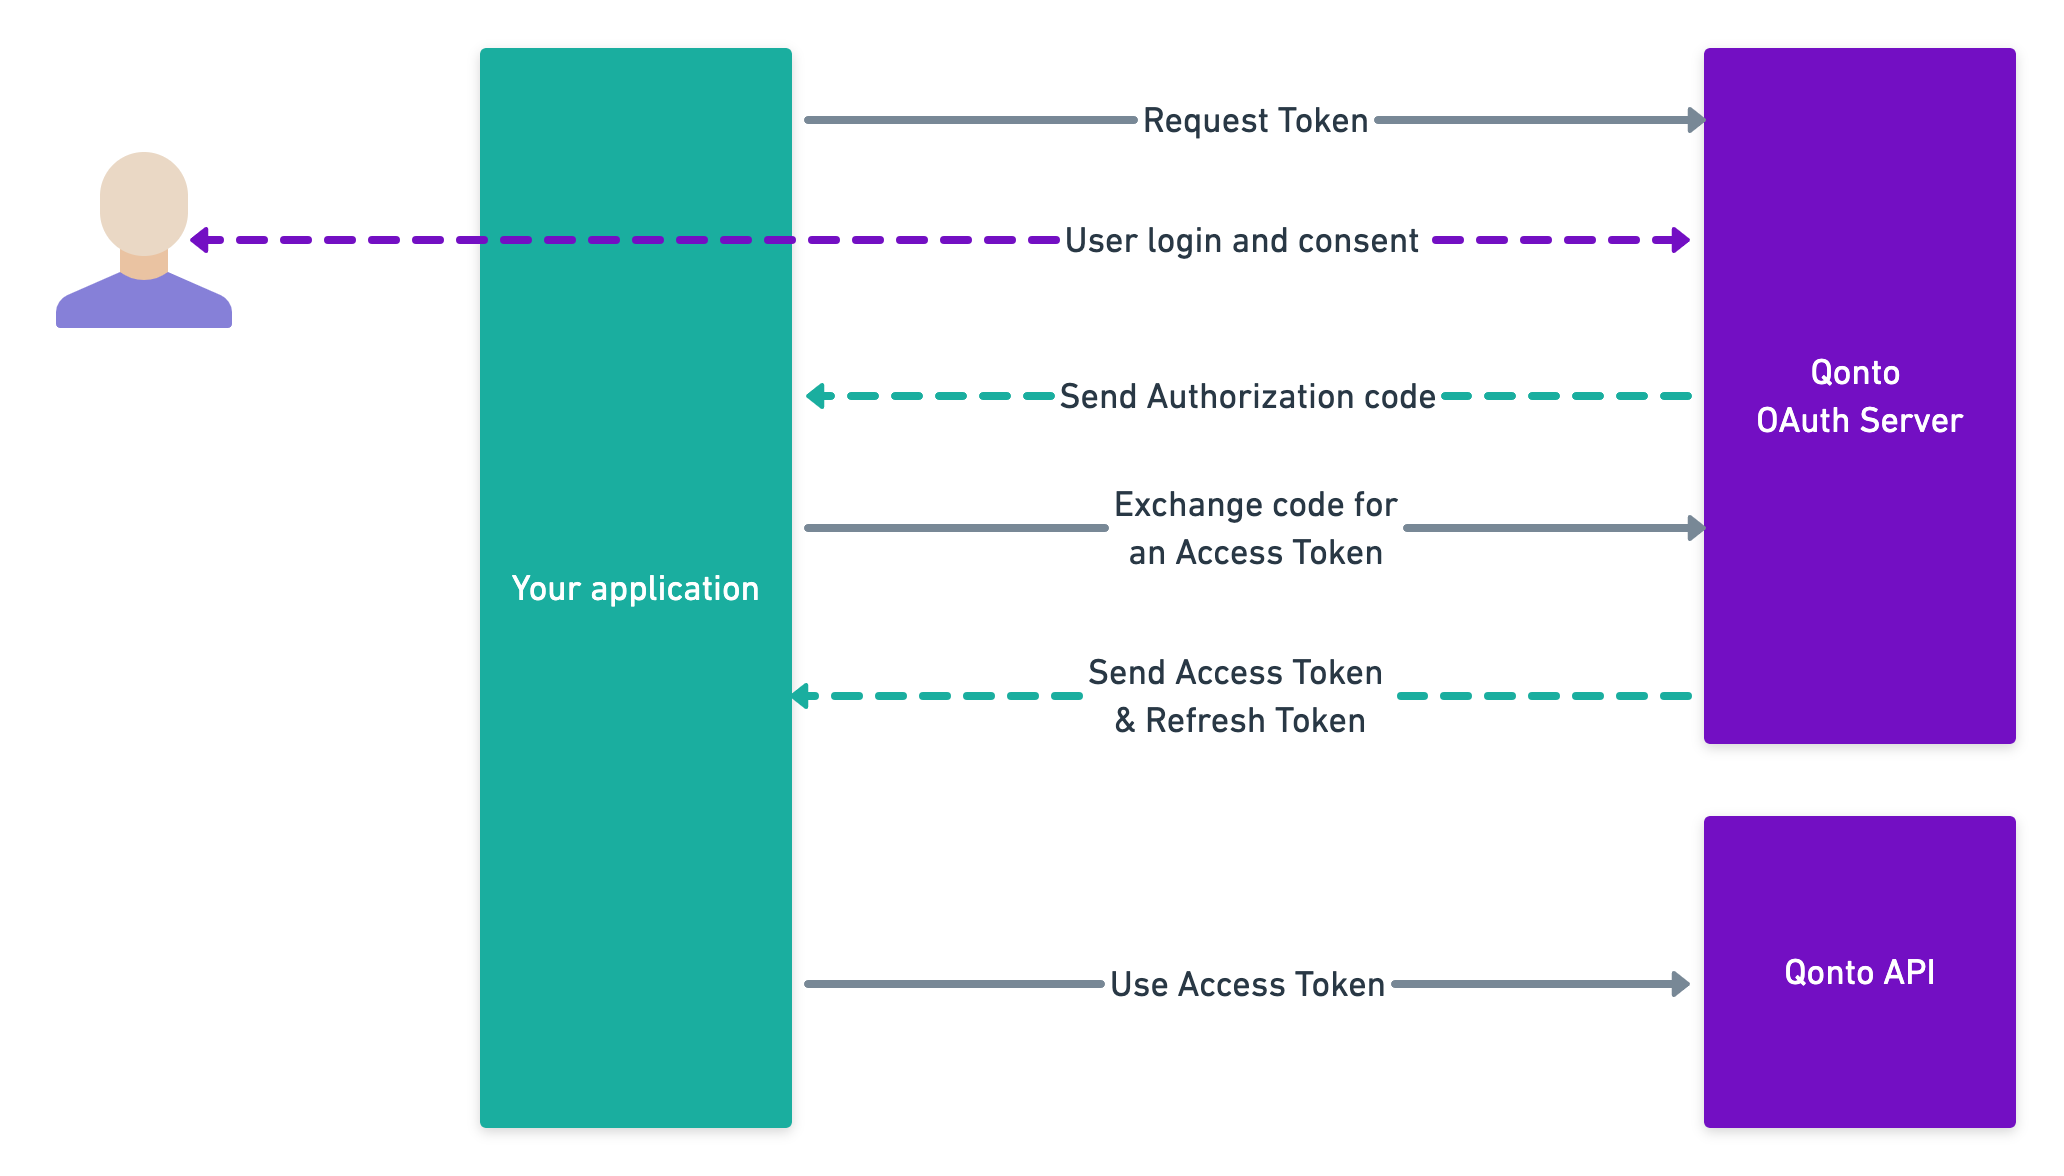
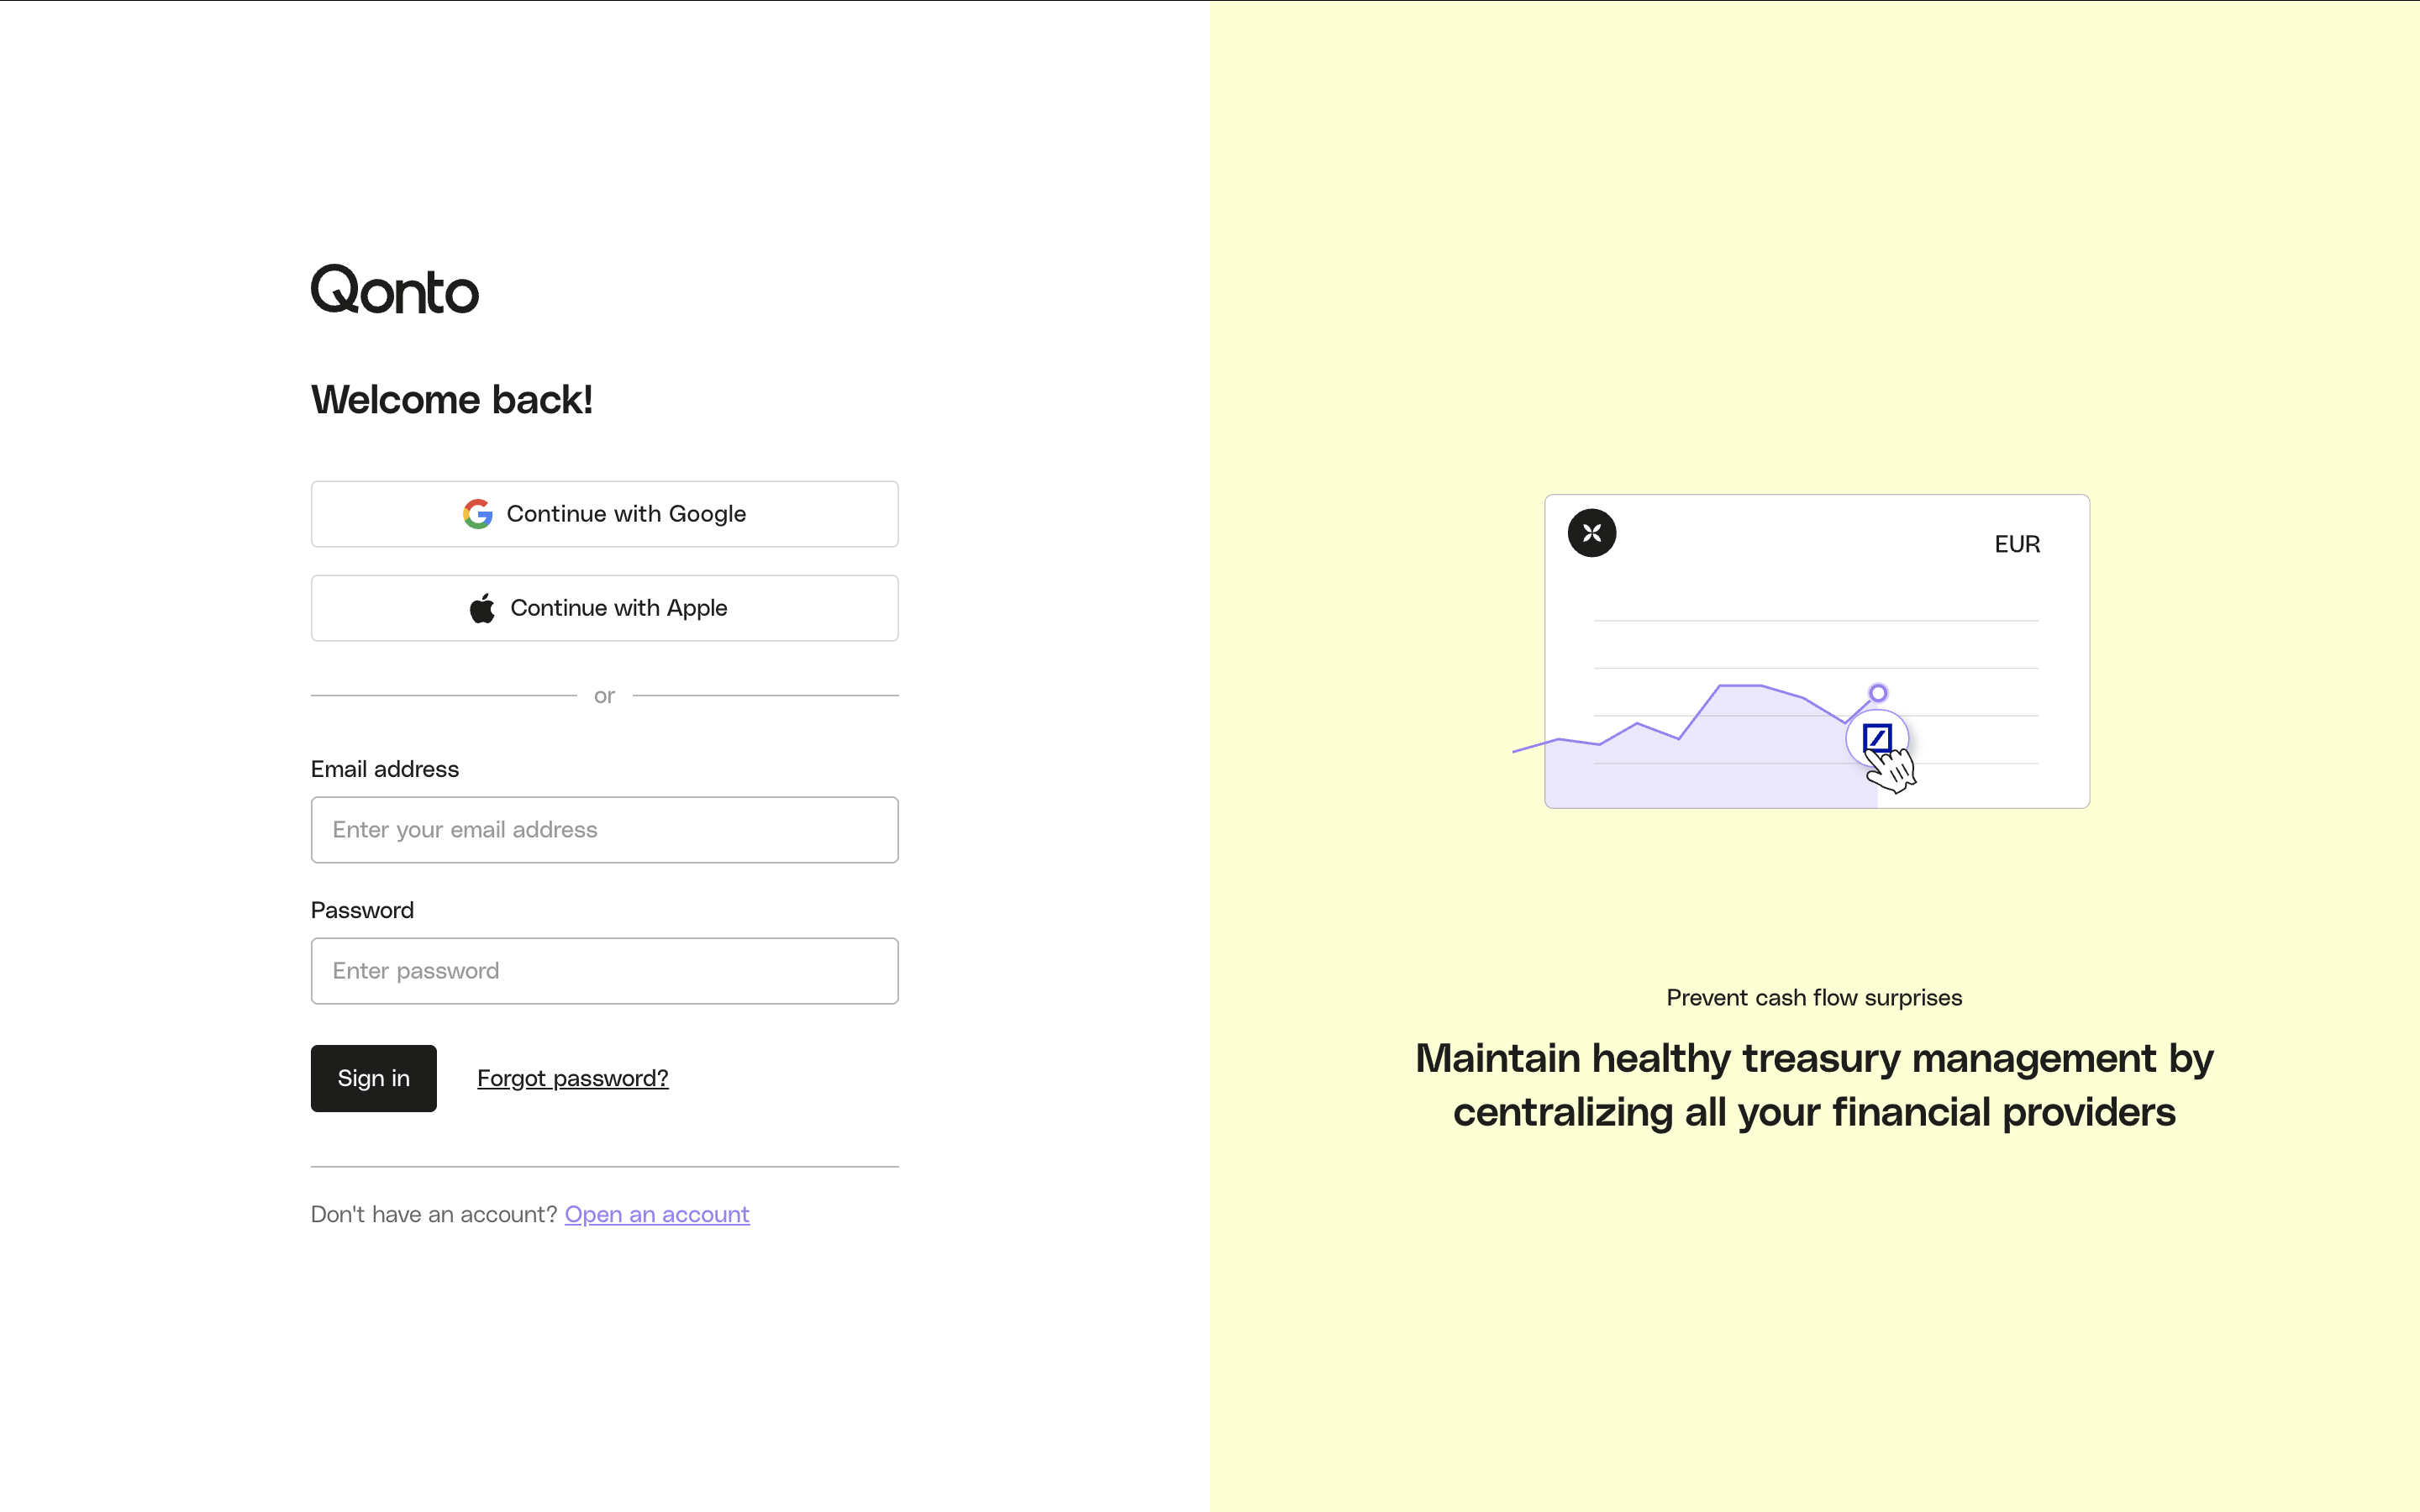
The first step is to redirect the user to the Qonto OAuth server. The Qonto user will be invited to authenticate.
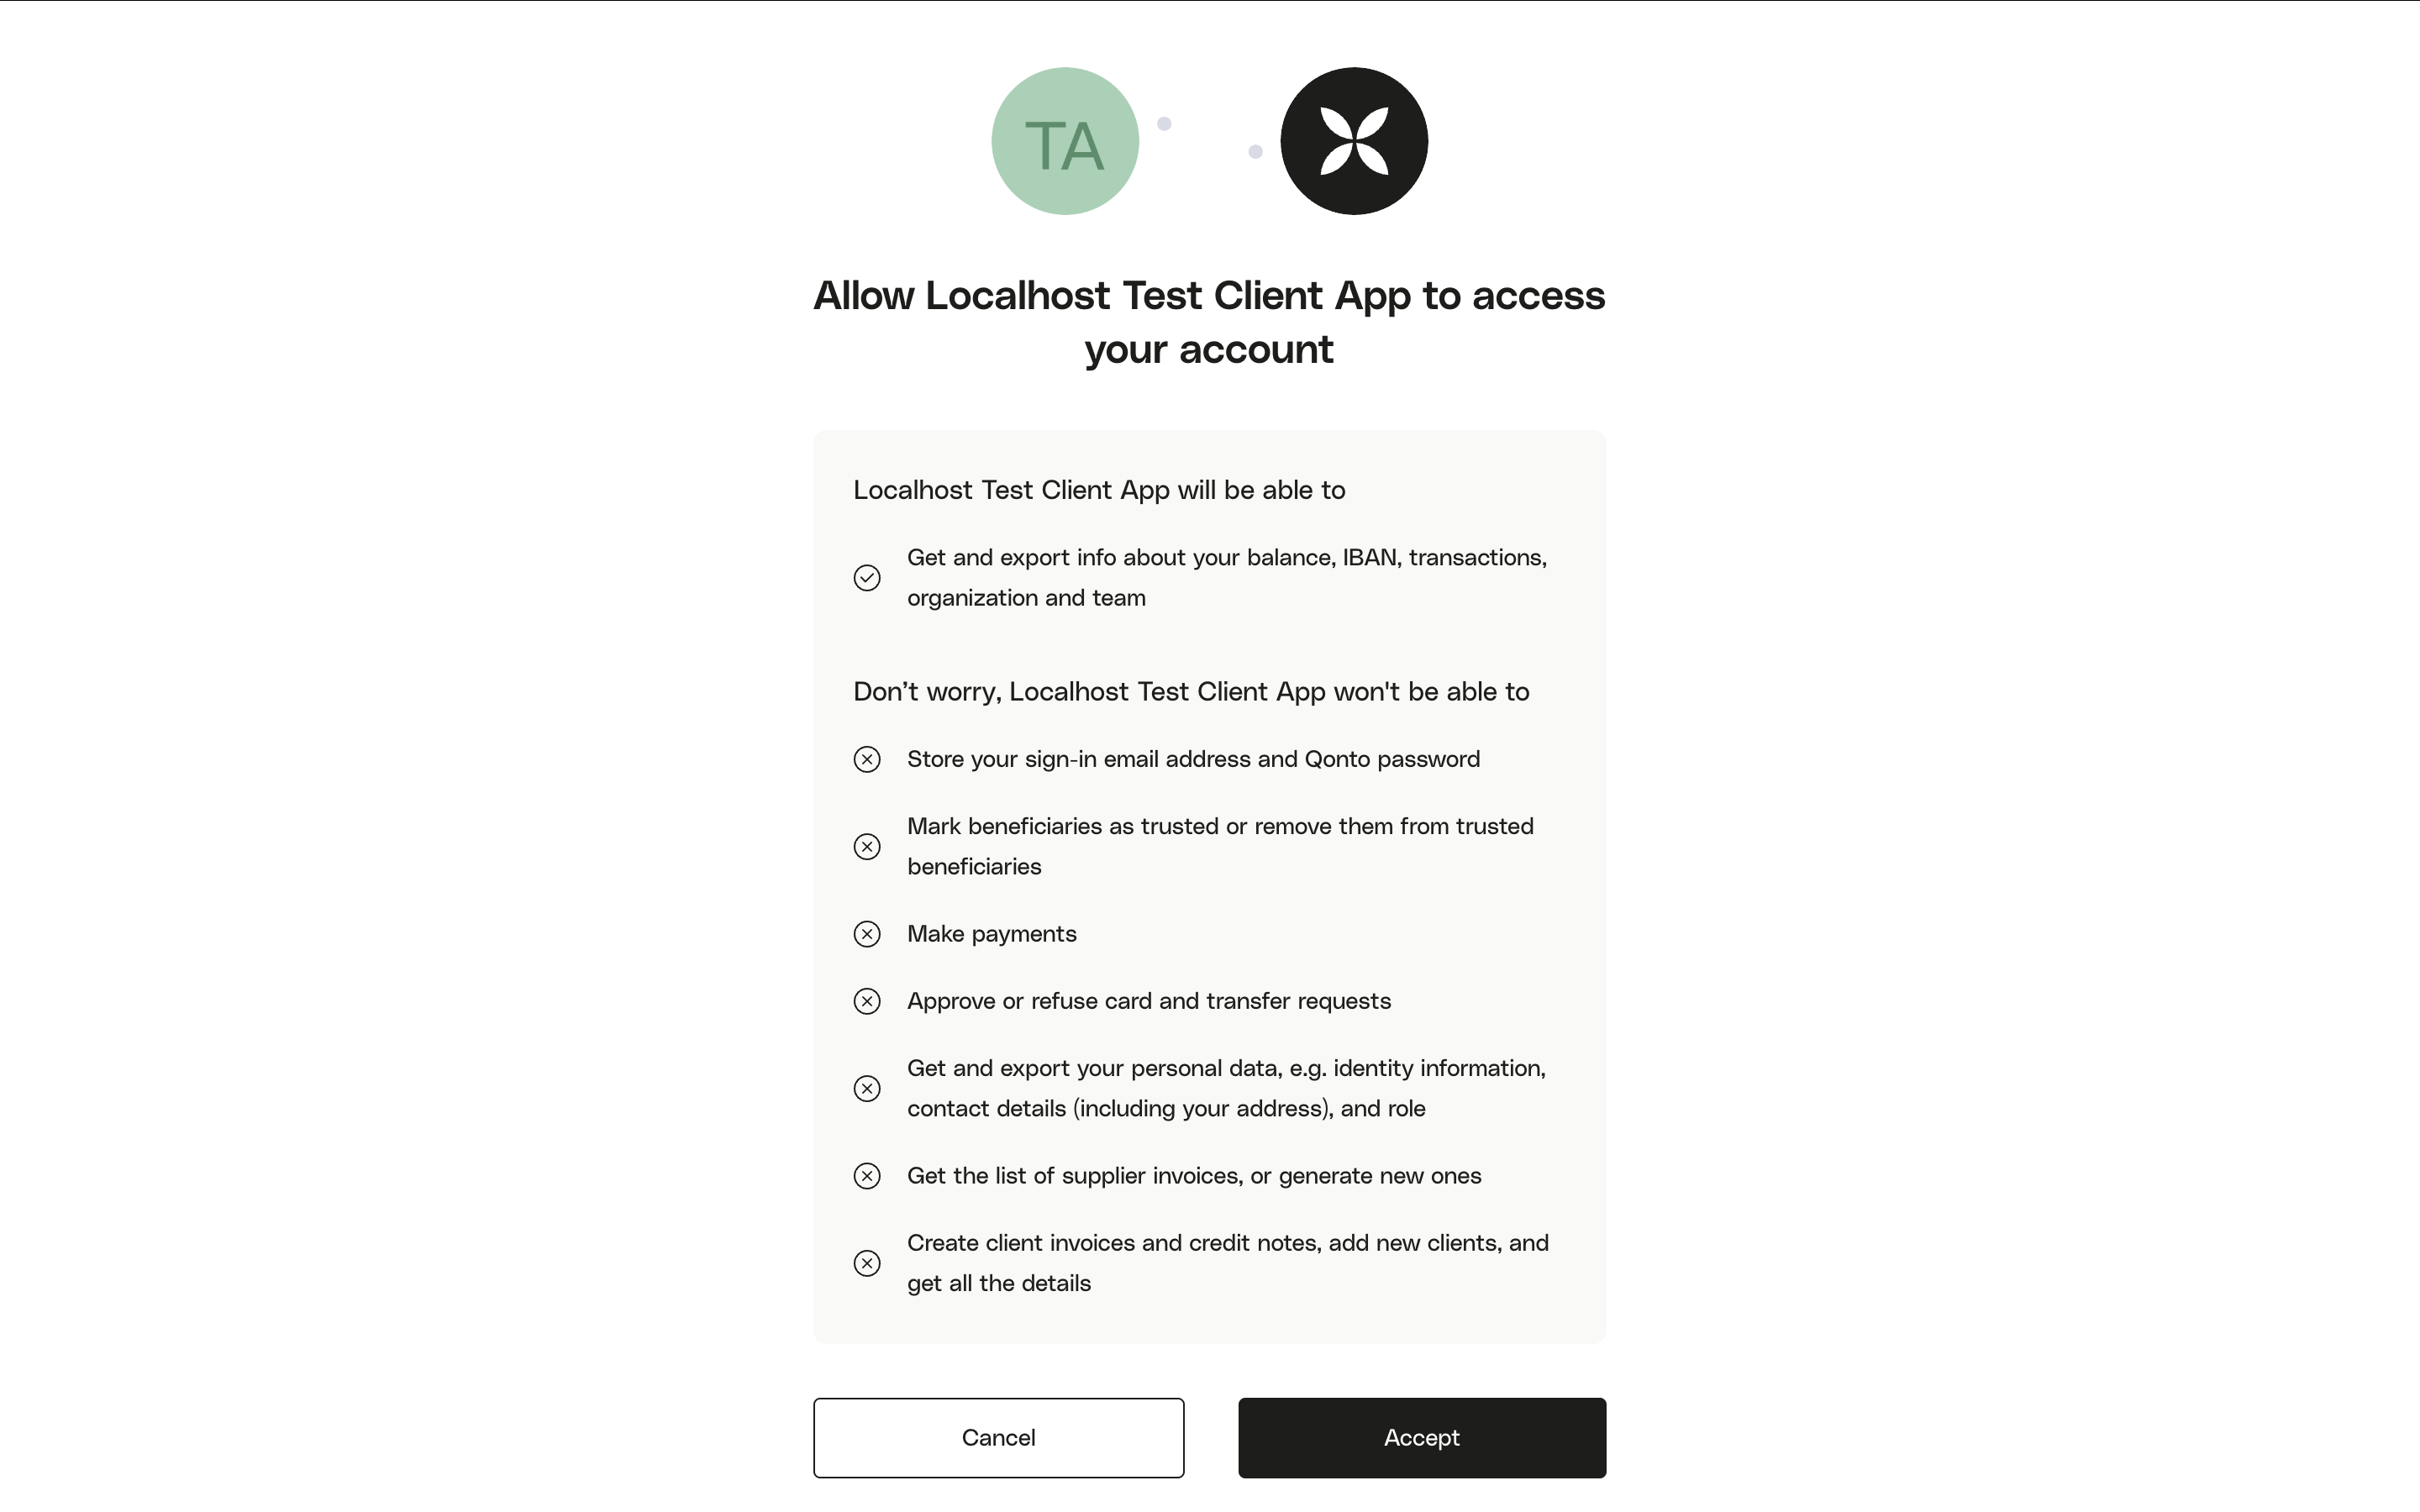
Then they will have to allow your application to access one of the organizations they are part of.
If you need your integration to run unattended (e.g. automations, scheduled tasks), include `offline_access` in your `scope` parameter. Without it, you will not receive a refresh token and your integration will stop working after 1 hour.
**CSRF protection with `state`:** Generate a unique, unpredictable value (e.g. a random 32-byte hex string), include it in the authorization URL as `state`, and store it in the user's session. When the user is redirected back to your `redirect_uri`, verify that the received `state` matches what you stored. Reject the flow if they differ — this protects against cross-site request forgery.
**Optional: restrict org selection.** You can pass `organization_id` to lock the flow to a specific organization, or `registration_id` to pre-select an org from the onboarding flow. In both cases the org selection screen is skipped.
cf. [this endpoint](/api-reference/business-api/authentication/oauth2/retrieve_authorization) for a full technical description of the query parameters.
```bash theme={null}
curl -G https://oauth.qonto.com/oauth2/auth \
--data-urlencode "client_id=YOUR_CLIENT_ID" \
--data-urlencode "redirect_uri=https://your-app.com/callback" \
--data-urlencode "response_type=code" \
--data-urlencode "scope=offline_access organization.read" \
--data-urlencode "state=YOUR_RANDOM_STATE"
# Copy the URL from the output and redirect the user to it
```
```python theme={null}
import urllib.parse
import secrets
state = secrets.token_urlsafe(32) # store in session for CSRF verification
params = {
"client_id": "your-client-id",
"redirect_uri": "https://your-app.com/callback",
"response_type": "code",
"scope": "offline_access organization.read",
"state": state,
}
auth_url = "https://oauth.qonto.com/oauth2/auth?" + urllib.parse.urlencode(params)
# Redirect the user to auth_url
```
```javascript theme={null}
const crypto = require('crypto');
const state = crypto.randomBytes(32).toString('hex'); // store in session
const params = new URLSearchParams({
client_id: 'your-client-id',
redirect_uri: 'https://your-app.com/callback',
response_type: 'code',
scope: 'offline_access organization.read',
state,
});
const authUrl = `https://oauth.qonto.com/oauth2/auth?${params.toString()}`;
// Redirect the user to authUrl
```
**After consent**, Qonto redirects the user to your `redirect_uri` with a temporary `code` and the `state` you provided:
`https://your-app.com/callback?code=AUTH_CODE&state=YOUR_STATE`
Invalid `client_id` or `redirect_uri` in the authorization request.
The `client_id` was not found. Double-check the value from your Developer Portal.
Once user has granted access to his account, he will be rederected to your application via your `redirect_uri` with a temporary authorization code.
On your backend, you will have to exchange this code for an `access_token`.
**Do not use `Authorization: Basic` headers.** Qonto requires `client_id` and `client_secret` as form body parameters. Sending them in the header will result in an `invalid_client` error.
Never expose your `client_secret` on the client side — this call must be made from your backend.
The `redirect_uri` must exactly match the value registered with Qonto, including trailing slashes and query strings. Pass it as a plain string and let your HTTP library handle the form encoding — do not manually pre-encode it (e.g. avoid `https%3A%2F%2F...`). A mismatch causes `invalid_grant`.
```bash theme={null}
curl -X POST https://oauth.qonto.com/oauth2/token \
-H 'Content-Type: application/x-www-form-urlencoded' \
-d 'grant_type=authorization_code' \
-d 'code=YOUR_CODE' \
-d 'client_id=YOUR_CLIENT_ID' \
-d 'client_secret=YOUR_CLIENT_SECRET' \
-d 'redirect_uri=https://your-app.com/callback'
```
```python theme={null}
import requests
# Verify state matches what you stored in the session before proceeding
response = requests.post(
"https://oauth.qonto.com/oauth2/token",
data={
"grant_type": "authorization_code",
"code": code, # received in redirect_uri callback
"client_id": "your-client-id",
"client_secret": "your-client-secret",
"redirect_uri": "https://your-app.com/callback",
},
)
tokens = response.json()
access_token = tokens["access_token"]
refresh_token = tokens["refresh_token"] # requires offline_access scope
```
```javascript theme={null}
// Verify state matches what you stored in the session before proceeding
const response = await fetch('https://oauth.qonto.com/oauth2/token', {
method: 'POST',
headers: { 'Content-Type': 'application/x-www-form-urlencoded' },
body: new URLSearchParams({
grant_type: 'authorization_code',
code, // received in redirect_uri callback
client_id: 'your-client-id',
client_secret: 'your-client-secret',
redirect_uri: 'https://your-app.com/callback',
}),
});
const { access_token, refresh_token } = await response.json();
// refresh_token requires offline_access scope
```
The response contains an `access_token` (valid **1 hour**) and, if `offline_access` was requested, a `refresh_token` (valid **90 days**).
Store the `refresh_token` securely — use it to obtain new access tokens without user interaction. See the [Refresh token endpoint](/api-reference/business-api/authentication/oauth2/create_tokens).
### Error responses
**Causes:** Missing required parameter (`code`, `client_id`, `client_secret`, `redirect_uri`, or `grant_type`), or wrong `Content-Type` header (must be `application/x-www-form-urlencoded`).
**Causes:** Wrong `client_id` or `client_secret`, or credentials sent via an `Authorization: Basic` header instead of as form body parameters.
**Causes:** Authorization code expired (10-minute TTL), code already used, or `redirect_uri` does not exactly match the registered value.
**Causes:** One or more of the requested scopes are not activated on your OAuth application.
cf. [API reference](/api-reference/business-api/authentication/oauth2/create_tokens) for full parameter details.
To perform authenticated requests on the Qonto API, you will have to provide the `access_token` in the `Authorization` header, as describe in this example:
```bash {4} theme={null}
curl GET 'https://thirdparty.qonto.com/organization' \
--header 'Accept: application/json' \
--header 'Content-Type: application/json' \
--header 'Authorization: Bearer YOUR_ACCESS_TOKEN'
```
```python {5} theme={null}
import requests
response = requests.get(
"https://thirdparty.qonto.com/organization",
headers={"Authorization": f"Bearer {access_token}"},
)
organization = response.json()
```
```javascript {3} theme={null}
const response = await fetch('https://thirdparty.qonto.com/organization', {
headers: {
Authorization: `Bearer ${access_token}`,
},
});
const { organization } = await response.json();
```
The `access_token` expires after **1 hour**. Rather than restarting the entire OAuth flow, use the `refresh_token` to obtain a new one silently on your backend.
**Refresh tokens are one-time use.** Every refresh call invalidates the token you used and returns a new `refresh_token` in the response. You must store this new token immediately — using an old refresh token will result in an `invalid_grant` error. If two processes attempt to refresh the same token concurrently, the second request will always fail.
```bash {3, 5} theme={null}
curl -X POST https://oauth.qonto.com/oauth2/token \
-H 'Content-Type: application/x-www-form-urlencoded' \
-d 'grant_type=refresh_token' \
-H 'Accept: application/json' \
-d 'refresh_token=YOUR_REFRESH_TOKEN' \
-d 'client_id=YOUR_CLIENT_ID' \
-d 'client_secret=YOUR_CLIENT_SECRET'
```
```python {6, 7} theme={null}
import requests
response = requests.post(
"https://oauth.qonto.com/oauth2/token",
data={
"grant_type": "refresh_token",
"refresh_token": stored_refresh_token,
"client_id": "YOUR_CLIENT_ID",
"client_secret": "YOUR_CLIENT_SECRET",
},
)
tokens = response.json()
# Store both new tokens — the old refresh_token is now invalidated
access_token = tokens["access_token"]
stored_refresh_token = tokens["refresh_token"]
```
```javascript {5, 6} theme={null}
const response = await fetch('https://oauth.qonto.com/oauth2/token', {
method: 'POST',
headers: { 'Content-Type': 'application/x-www-form-urlencoded' },
body: new URLSearchParams({
grant_type: 'refresh_token',
refresh_token: storedRefreshToken,
client_id: 'YOUR_CLIENT_ID',
client_secret: 'YOUR_CLIENT_SECRET',
}),
});
const tokens = await response.json();
// Store both new tokens — the old refresh_token is now invalidated
accessToken = tokens.access_token;
storedRefreshToken = tokens.refresh_token;
```
**Token lifecycle at a glance:**
| Token | Lifetime | What to do when it expires |
| --------------- | -------- | ------------------------------------------------------------ |
| `access_token` | 1 hour | Use `refresh_token` to get a new one — no user action needed |
| `refresh_token` | 90 days | Restart the OAuth flow (user must re-authorize) |
As long as you refresh before the 90-day window closes and correctly store the latest `refresh_token` after each call, your integration will run indefinitely without requiring user re-authorization.
For full parameter details and error responses, see the [Refresh token endpoint](/api-reference/business-api/authentication/oauth2/create_tokens).
## Resources
* If you need to understand better the OAuth flow: [**Postman visual flow**](https://www.postman.com/qontoteam/workspace/qonto-public-api/flow/666c37ad3a6c630032f5b496).
* If you need more details about OAuth 2.0: [**Official documentation**](https://oauth.net/2/).
* Testing in the sandbox? See the [**Sandbox guide**](/get-started/business-api/authentication/oauth/sandbox).